Record a Podcast
Record Your Voice
Learn how to record your voice, play it back, and edit using the Audio Recorder in GarageBand.
Estimated time to complete this tutorial:
10 mins
Learn how to record your voice, play it back, and edit using the Audio Recorder in GarageBand.
Estimated time to complete this tutorial:
10 mins
Enhance your voice recording by selecting the right sound preset.
Step 1
Tap Fun.
Step 2
Before you start recording, find the built‑in iPad microphone.
Step 3
The microphone is located on the opposite side of the charging port.
Step 4
Tap OK.
Step 5
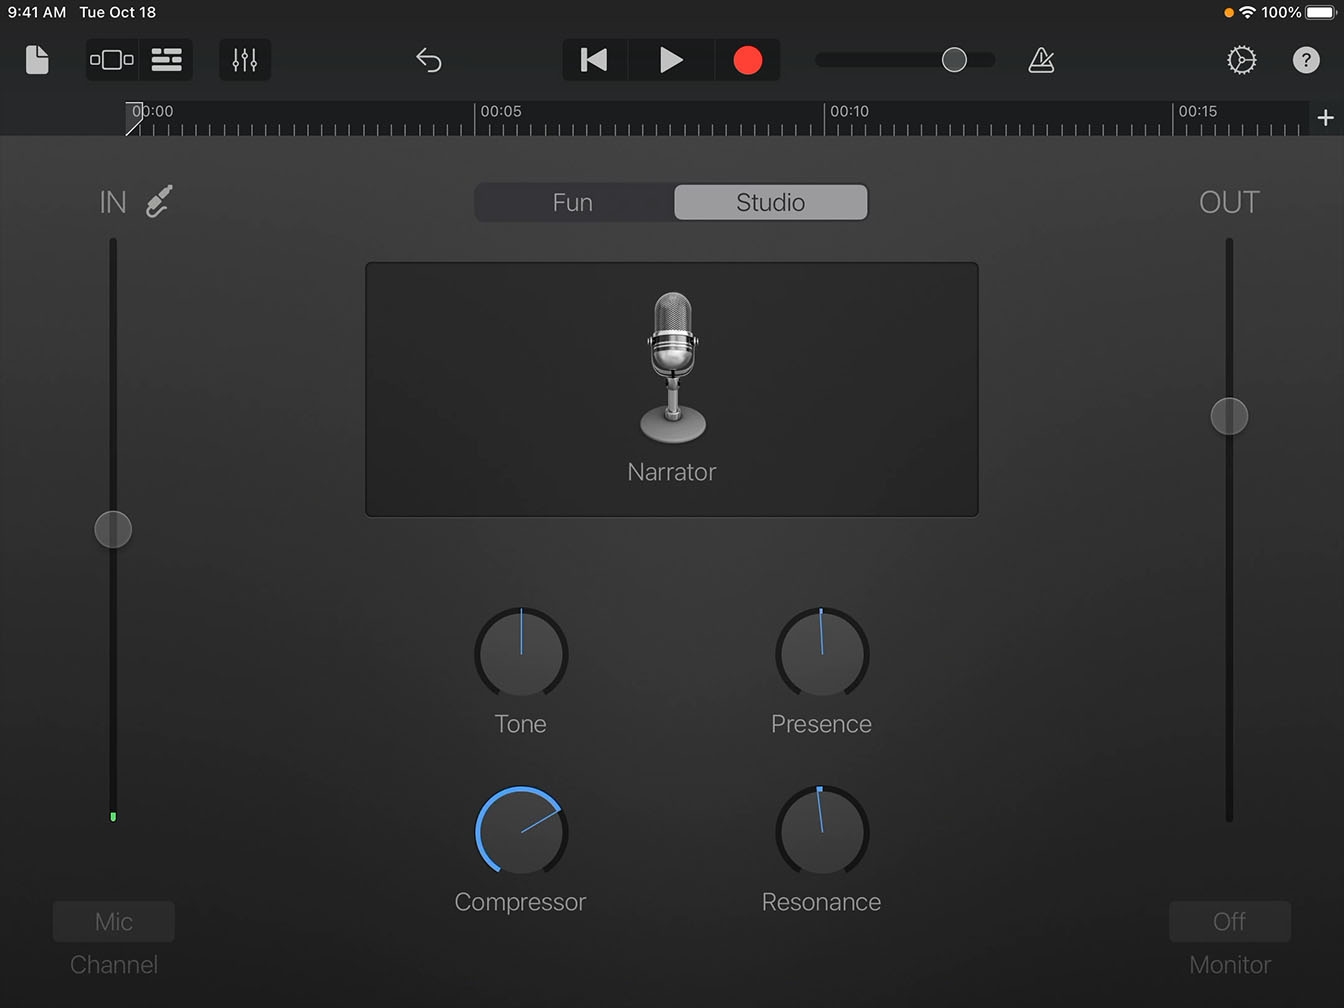
Tap Studio.
Step 6
Tap the Clean microphone in the middle of the screen.
Step 7
Tap Vocals.
Step 8
Scroll through the list of presets and look for Narrator.
Step 9
Tap Narrator.
Step 10
Tap Done.
Adjust your input or recording levels before starting a project to ensure that your voice, instrument, or other recordings sound their best.
Step 1
Before you set your levels, find a quiet space.
Step 2
Place the iPad microphone close to your mouth and practice speaking in a natural voice.

Step 3
Adjust the In slider so the green line is about halfway up the meter when speaking.
Tip
If the level turns red, drag the slider down.
Step 4
Before you record, review these steps:
Step 5
Follow the previous step and record your interview.
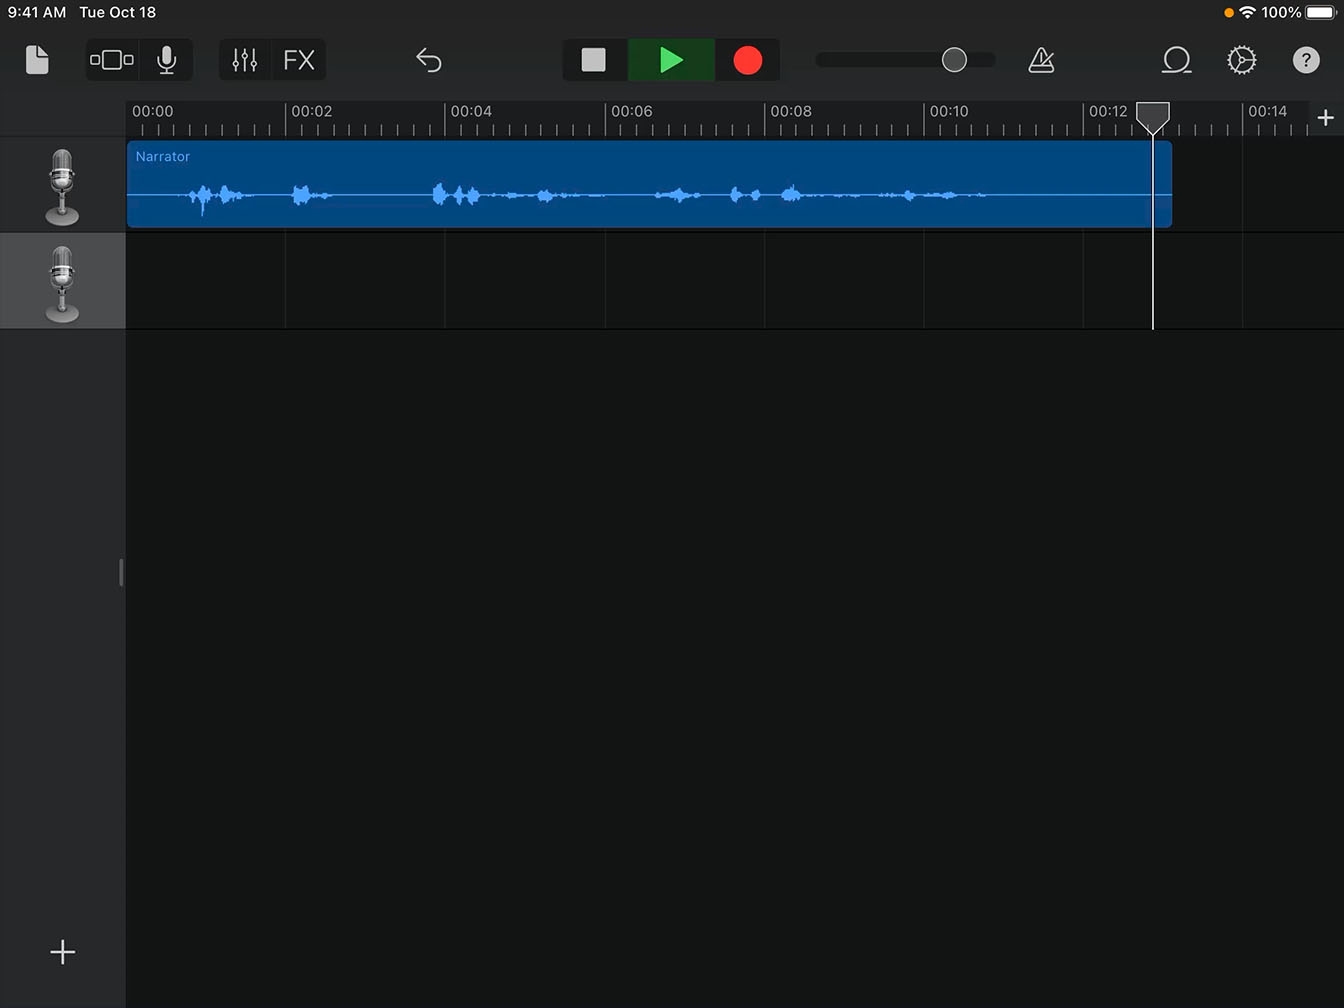
Step 6
Tap Tracks to view your recording.
Tip
Tracks view lets you see every recording that you add to a project as a rectangular block. This block is called a region.
Step 7
Tap Play to hear what you just recorded.
Step 8
When you’re done listening to your recording, tap Stop.Stop .
Step 9
Tap Go to Beginning in the control bar.
Tip
If you didn’t get the perfect recording, you can always tap Undo and record again.
Duplicating tracks and splitting recordings are essential editing skills.
Step 1
Tap the microphone icon in the track header to select the track.
Step 2
From the menu that appears, tap Duplicate.
Tip
You now have a duplicate track with the same settings as the original.
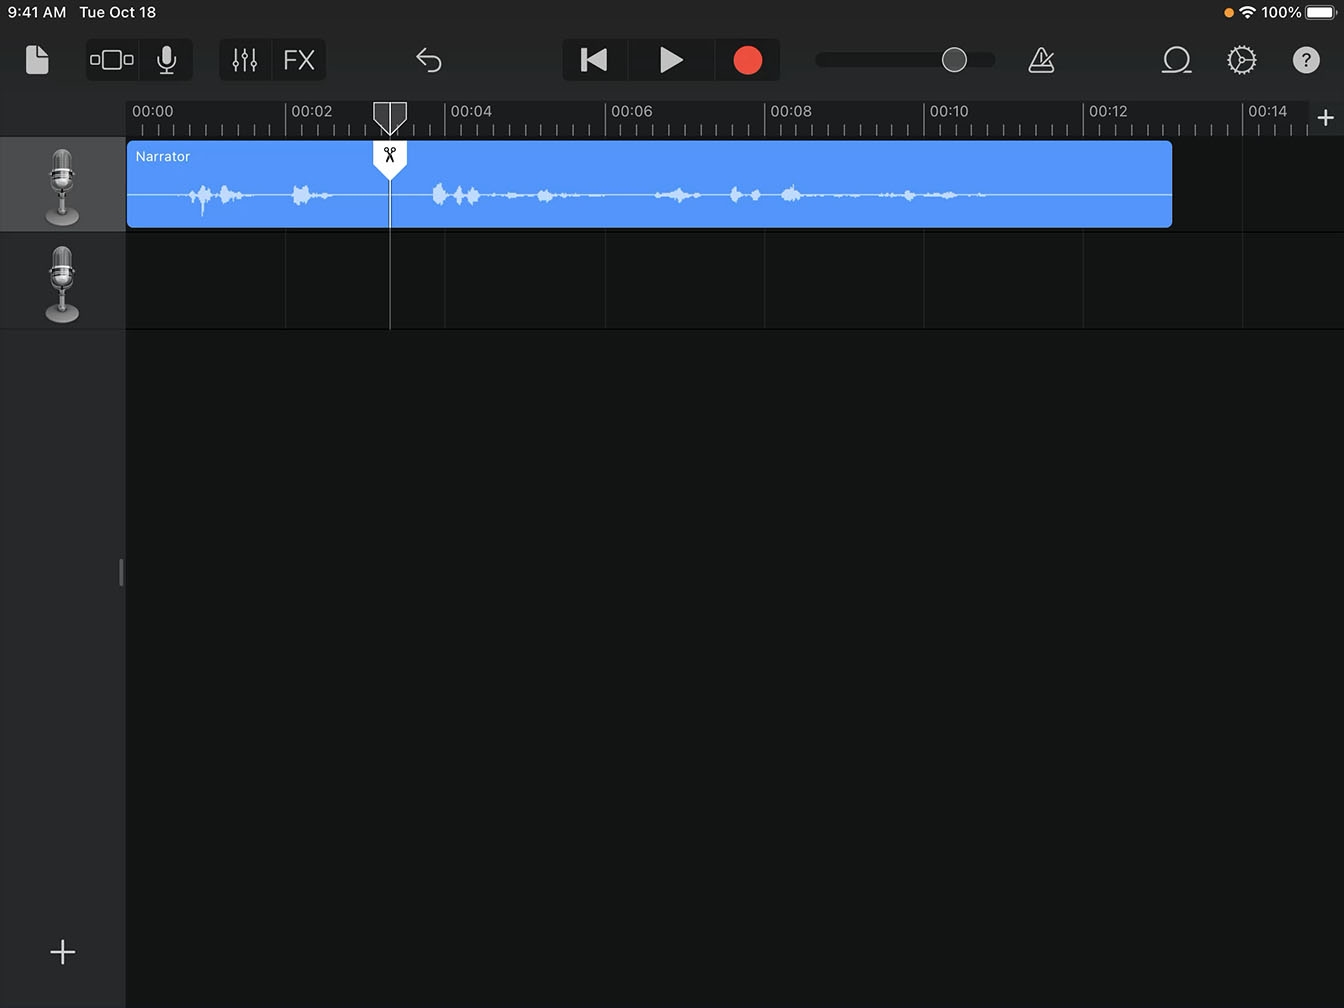
Step 3
Tap Play to listen to the question and answer.
Step 4
Tap Stop and move the playhead right after the end of the question.
Step 5
Tap the region to select it.
Step 6
Tap the region again.
Step 7
From the menu that appears, tap Split.
Step 8
Drag the Split marker (the scissors) down. This will split the region into two separate regions.
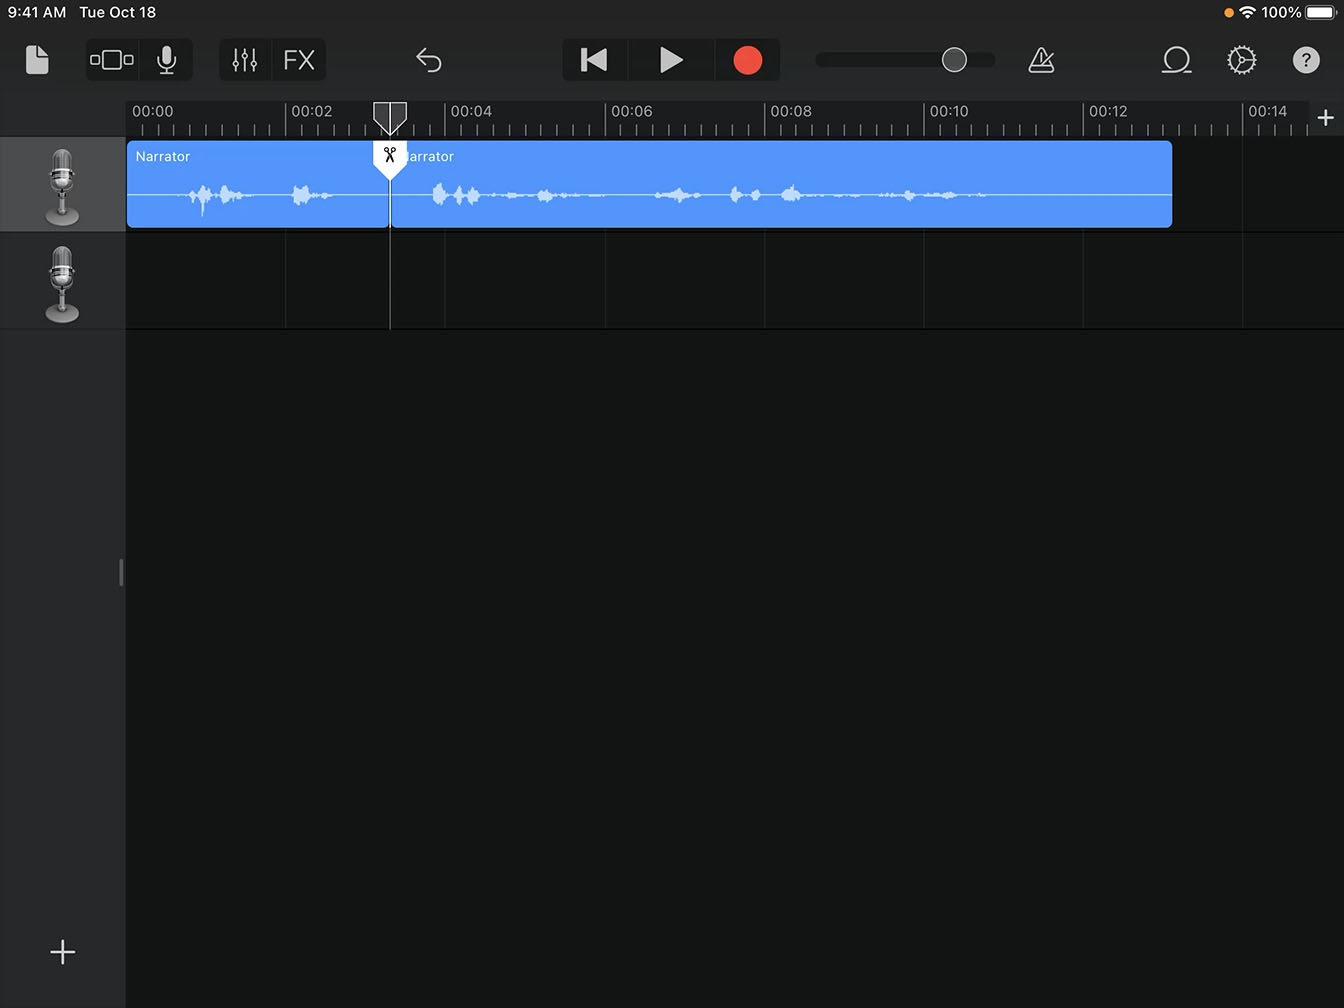
Step 9
Drag the newly‑split second region down to track 2. You now have two tracks, one for the question and a second one for the answer.
Tip
If your recording has multiple responses, use this same technique to split each one.


