

Creating Sizzle the Snake with Apple-Native Apps
What if we could create an engaging multimedia learning resource using only the apps available on our iPad?
For my Year 1 phonics lesson, I created Sizzle the Snake, an animated character that introduces the /s/ sound through visuals, sound effects, vocabulary and a rhythmic jazz chant.
Here's how I brought the idea to life using four Apple-native apps!
1. What Will You Create?
An animated phonics learning video featuring:
- A friendly character named Sizzle.
- Animated illustrations and vocabulary.
- Clear pronunciation of the /s/ sound.
- A rhythmic phonics jazz chant.
- A complete multimedia learning sequence.
The resource is designed to support Year 1 ESL learners in recognising and reproducing the /s/ phoneme.
2. Tools & Requirements
- Target Learners: Year 1 ESL pupils
- Device: iPad
- Apps: Freeform, Keynote, GarageBand and iMovie
- Skill Level: Beginner to Intermediate
- Estimated Creation Time: 2–3 hours for a simple version, depending on experience
3. Step-by-Step Creation Guide
Step 1: Plan with Freeform
I began by reviewing the Year 1 English Scheme of Work and identifying the target phoneme, learning objectives and vocabulary.
Using Freeform, I created a visual mind map to organise the lesson content, illustrations, sounds and activities.
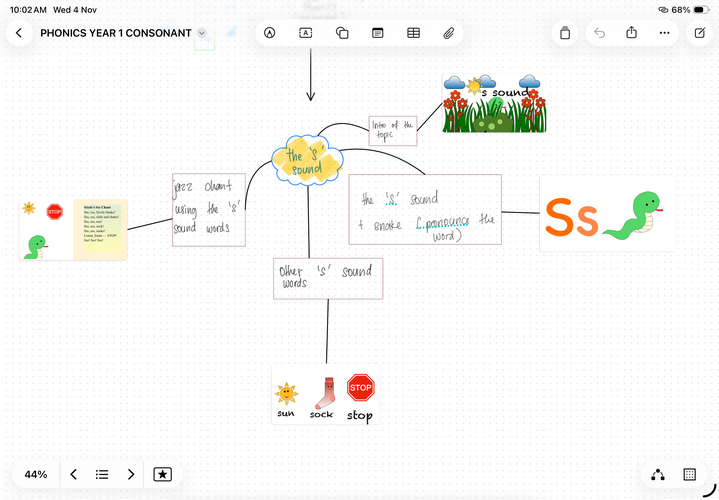
Try it: Open Freeform, create a new board and use text boxes, images and connectors to organise your ideas.
Step 2: Design and Animate with Keynote
Next, I created Sizzle the Snake and supporting illustrations using Keynote shapes.
I designed slides featuring the letter S/s, the snake, sun, sock, stop sign, strawberry and other visual elements.
I also added animations to make the characters and illustrations more engaging.
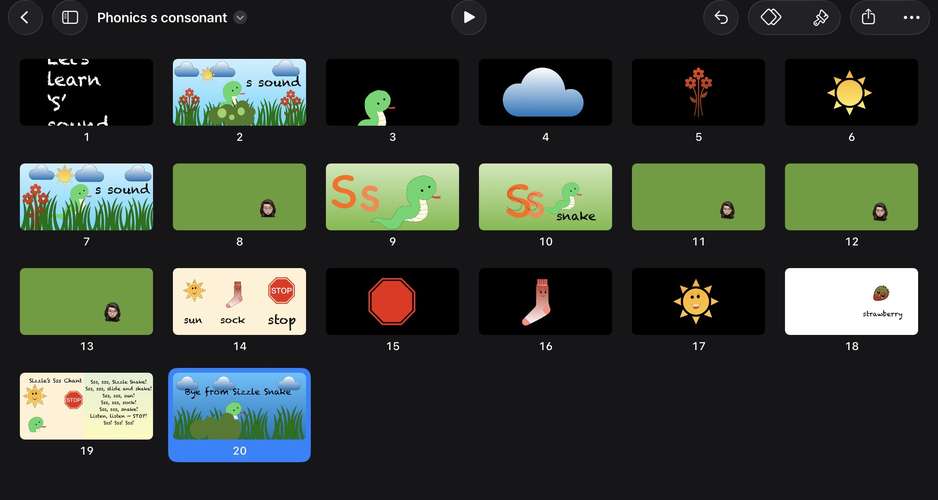
Try it: Open Keynote, create a blank presentation, insert shapes and customise them. Add animations using Build In, Build Out or Action effects, then export the required sequences as movie clips or GIFs.
Step 3: Create Sounds and Music with GarageBand
I used GarageBand to record the /s/ sound and create a simple jazz chant using rhythm and repetition.
The recordings provided the audio elements for the phonics video.
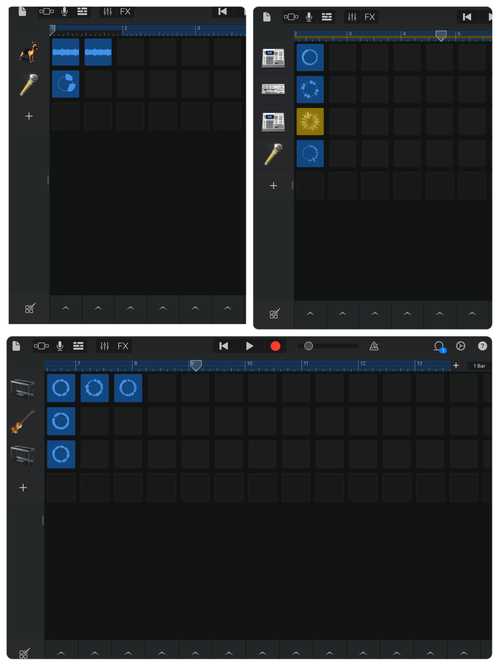
Try it: Open GarageBand, select Audio Recorder, record the target sounds and chant, then export the completed recording as an audio file.
Step 4: Bring Everything Together with iMovie
Finally, I imported the Keynote visuals and movie clips into iMovie.
I arranged the clips according to the learning sequence, added the GarageBand audio and adjusted the timing to match the animations.
The result was a complete multimedia phonics video featuring Sizzle the Snake!
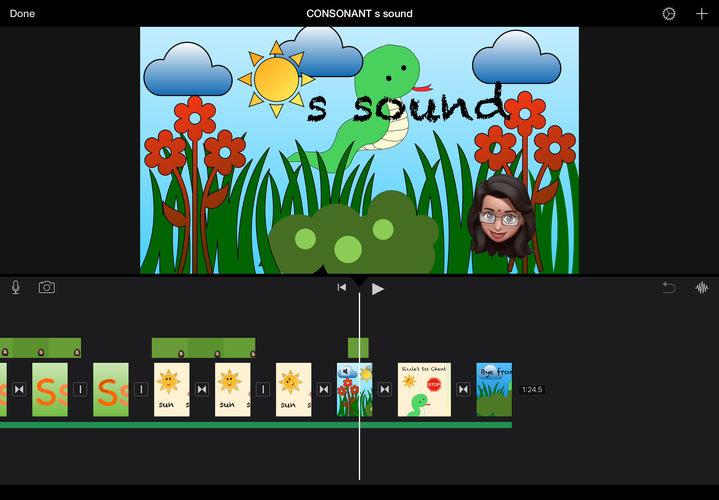
Try it: Open iMovie, create a Movie project, import your visuals and audio, arrange the timeline, preview the sequence and export the finished video.
Step 5: Test and Refine
Before sharing the video, check the pronunciation, pacing, visibility of the vocabulary and clarity of the audio.
Ensure pupils have sufficient time to listen and repeat each sound.
Step 6: Export and Share
Export the completed iMovie project as a video and save it to Files or Photos.
The resource can be shared with colleagues or used directly in the classroom.
4. Downloadable Resources
The following resources can be shared to support other educators:
- Freeform planning board.
- Keynote visuals and animations.
- GarageBand audio.
- Completed iMovie phonics video.
5. Tips for Educators
- Begin with one sound and a few familiar words.
- Keep illustrations simple and colourful.
- Use animations to support learning rather than distract pupils.
- Ensure the pronunciation is clear and accurate.
- Include opportunities for pupils to listen, repeat and respond.
- Consider captions, readable text and accessible playback options.
6. Classroom Application
The completed video can be used for lesson introductions, guided pronunciation practice, vocabulary reinforcement or revision.
Teachers can adapt the same creative workflow to teach other phonemes, CVC words, vocabulary or storytelling.
The process can also be adapted into a student-created multimedia project for older learners.
7. Your Turn!
This project reminded me that creating digital learning materials does not always require complicated tools.
Freeform helped me plan. Keynote brought my ideas to life. GarageBand added rhythm and sound. iMovie connected everything into one learning experience.
Four Apple apps, one phonics sound and endless possibilities for creativity!
How would you use these apps to create your next learning resource?






Attach up to 5 files which will be available for other members to download.