

Pupils explore cohesive devices through animation, shared reading, and a collaborative Freeform mind map to improve their understanding of connected ideas in writing.
1. Lesson Overview
School Level: Malaysian Secondary School
Subject: English
Year / Form: Form 1
Topic / Unit: Writing Skills – Cohesive Devices in Email Writing
Curriculum Alignment:
Content Standard 4.1: Communicate intelligibly through print and digital media on familiar topics.
Learning Standard 4.1.5: Connect sentences into two coherent paragraphs or more using basic coordinating conjunctions and reference pronouns.
Supporting Learning Standards:
- 3.1.1 – Understand the main points in simple longer texts.
- 3.1.2 – Understand specific details and information in simple longer texts.
Duration: 60 minutes
Apple Technology: iPad
Apps Used: Freeform, Keynote, Camera and Photos
2. Learning Objectives
By the end of the lesson, pupils will be able to:
- Read and understand a short text based on an animation.
- Identify at least four cohesive devices used in the text.
- Classify cohesive devices according to their functions using a digital mind map in Freeform.
- Explain how cohesive devices help connect ideas and improve the flow of writing.
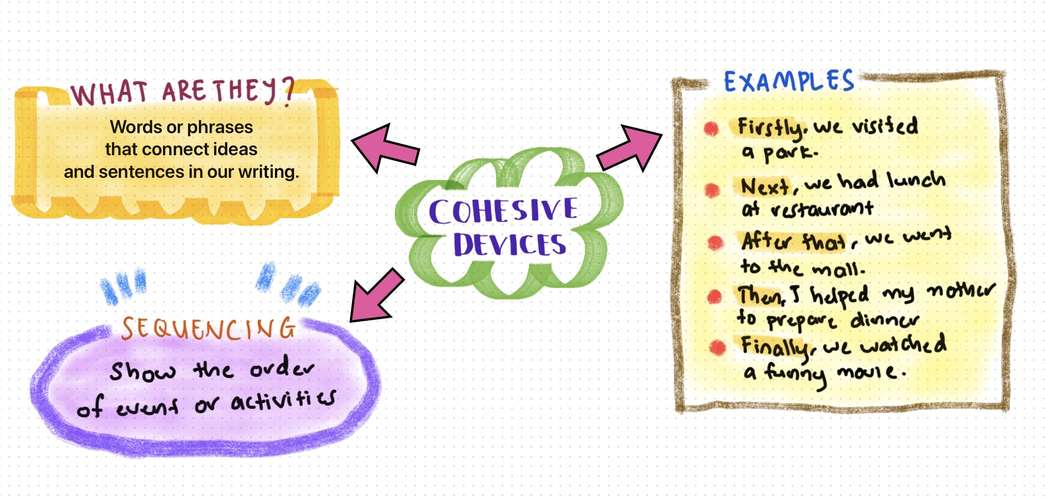
3. Step-by-Step Creation Guide
Step 1: Plan Your Learning Activity
Plan the mind map layout before creating it.
- Central topic: Cohesive Devices
- Left section: Definition
- Bottom section: Sequencing
- Right section: Examples
Use a balanced layout with enough space for each section.
Step 2: Prepare Your Learning Materials
Prepare the text and examples to be included in the mind map.
- Definition of cohesive devices
- Meaning of sequencing words
- Examples: Firstly, Next, After that, Then, Finally
Keep the information short and simple.
Step 3: Create Using Apple Technology
- Open Freeform and create a new board.
- Use the Shapes tool to create a cloud for the central topic.
- Add text boxes for the definition, sequencing, and examples.
- Use different colours to distinguish each section.
- Arrange the elements on the canvas.
Step 4: Add Interactive or Creative Elements
- Use the Drawing tool to add handwritten doodles, circles, and highlights.
- Use Connectors to link the central topic to each section.
- Add Sticky Notes for examples.
- Insert images or illustrations using the Media tool.
- Adjust colours and shapes to create a doodle-style design.
Step 5: Test and Refine
- Zoom out to view the entire mind map.
- Check the text size, spelling, and layout.
- Adjust the shapes, colours, and connectors.
- Remove unnecessary decorations.
Ensure the mind map is clear, balanced, and visually appealing.
Step 6: Export and Share
- Tap the Share button in Freeform.
- Export the board as a PDF.
- Save it to the Files application.
- Share the completed mind map with educators or pupils.
The original Freeform board can also be shared for further editing.






Attach up to 5 files which will be available for other members to download.