

Bringing Science to Life Through Creativity and Technology
Introduction
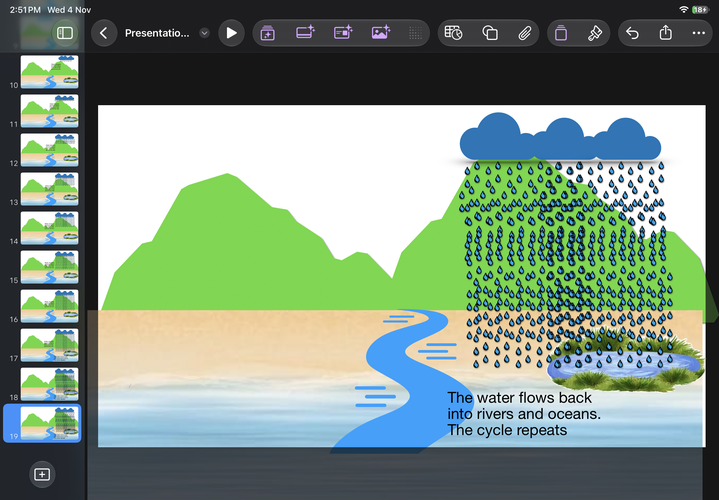
I recently created an educational animation titled Water Cycle using Apple Keynote.
This activity demonstrates how teachers can transform a regular presentation into an engaging animated learning experience without using complicated animation software.
By combining visual elements, graphic objects, text and animation effects, students can observe and understand how the water cycle takes place in our natural environment.
🛠️ How I Created This Animation Using Keynote
Step 1: Creating the Background
- Open Apple Keynote and create a new presentation.
- Select a suitable slide layout.
- Add visual elements such as mountains, sky, rivers, oceans and land.
- Arrange the elements to create a complete water cycle environment.
Step 2: Adding Visual Elements
I incorporated different graphic elements to represent the water cycle:
- The sun to represent the source of heat energy.
- Clouds to represent condensation.
- Raindrops to represent precipitation.
- Rivers and oceans to represent water collection.
- Mountains and landscapes to create the natural environment.
Step 3: Creating Animation Effects
- Use the Animate feature in Keynote.
- Apply animation effects to objects such as clouds and raindrops.
- Explore Build In, Action and Build Out to control object appearance and movement.
- Duplicate slides and gradually adjust object positions to create sequential movements.
- Use Magic Move where appropriate to create smoother transitions between slides.
Step 4: Creating the Water Cycle Simulation
Arrange the animation according to the scientific processes:
- Evaporation – Water from oceans, rivers and lakes changes into water vapour due to heat from the sun.
- Condensation – Water vapour cools and forms tiny water droplets, creating clouds.
- Precipitation – Water falls back to the Earth’s surface as rain.
- Collection – Rainwater flows into rivers, lakes and oceans.
Step 5: Adding Explanations
Include simple labels and descriptions to help students understand each stage of the water cycle.
Finally, play the slideshow to view the complete animation.
🔬 Connection to Science Education
This animation can be integrated into Year 2 Science, particularly the topic of the Water Cycle.
Learning objectives include:
- Identifying the basic processes involved in the water cycle.
- Explaining how water evaporates, forms clouds and falls as rain.
- Understanding that water continuously moves through the environment.
- Connecting scientific concepts to real-life natural phenomena.
🎯 Educational Benefits
Using Keynote in science lessons allows teachers to:
- Apply visual learning strategies.
- Make abstract scientific concepts easier to understand.
- Integrate creativity and technology into STEM education.
- Encourage students to create their own science animations.
- Increase student engagement through digital learning experiences.
💡 Taking It Further
Teachers can extend this activity by encouraging students to create their own water cycle animations using Keynote.
Students are not just learning scientific concepts; they are also developing creativity, communication, critical thinking and digital literacy skills.
Technology is not just a tool for presenting information. It empowers students to create, explore and demonstrate their understanding in meaningful ways.
What about you? Have you tried using Keynote to create educational animations in your classroom? I’d love to hear how you integrate Apple technology into your teaching and learning activities.
#AppleEducation #AppleTeacher #Keynote #ScienceEducation #STEM #DigitalLearning #WaterCycle






Attach up to 5 files which will be available for other members to download.